 |

Submitted by , posted on 16 September 1999
|
 |
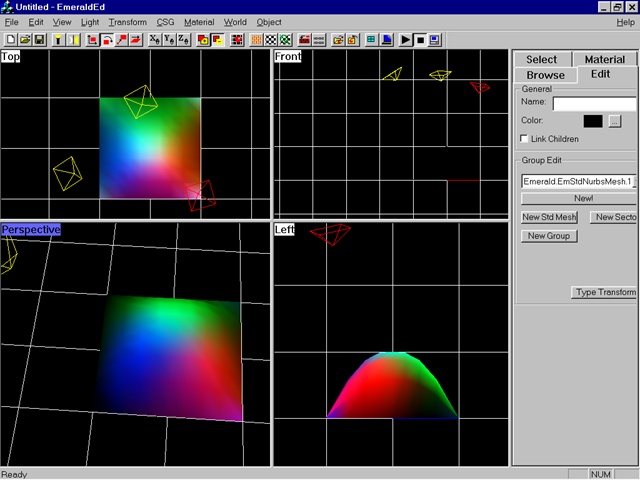
Image Description, by

This is a screen shot of the first time I got my NURBS tessalator working.
It shows a single NURBS patch(degree 3 and 5 control points in both U and
V), tessellated into bezier patches, which are then tessellated(in screen
space) into triangles and rendered with D3D.
The lighting is from a red, green and a blue spotlight(shown as wireframe
pyramids).
There were a few problems with the normals when I took this screen shot, but
it still looked cool after spending 8 hours writing(and trying to
understand) NURBS code for the first time:-)
If you have any comments then feel free to send them to:
dblack@innotts.co.uk
|
|